The new Standard Window
SmartGit 22.1 introduces the new Standard window. Here is a summary of the most important differences compared to the existing Working Tree and Log windows. In general you can consider it as third Git frontend in SmartGit, so you can decide which suites you best:
- the Working Tree window is focusing on your local files (you will need the Log window to see the complete history),
- the Log window is focusing on the graphical history but also allows local file operations,
- the new Standard window is combining the best of both worlds, focusing on stricter workflows to avoid common Git pitfalls.
If you are using the Working Tree or Log window by default in SmartGit 22.1, use Window | Show Standard Window to give the Standard window a try.
New User Interface
Local Files vs History
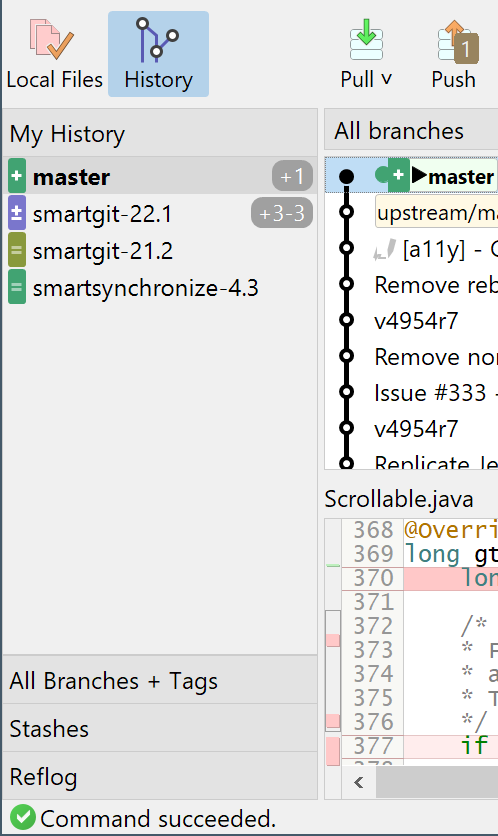
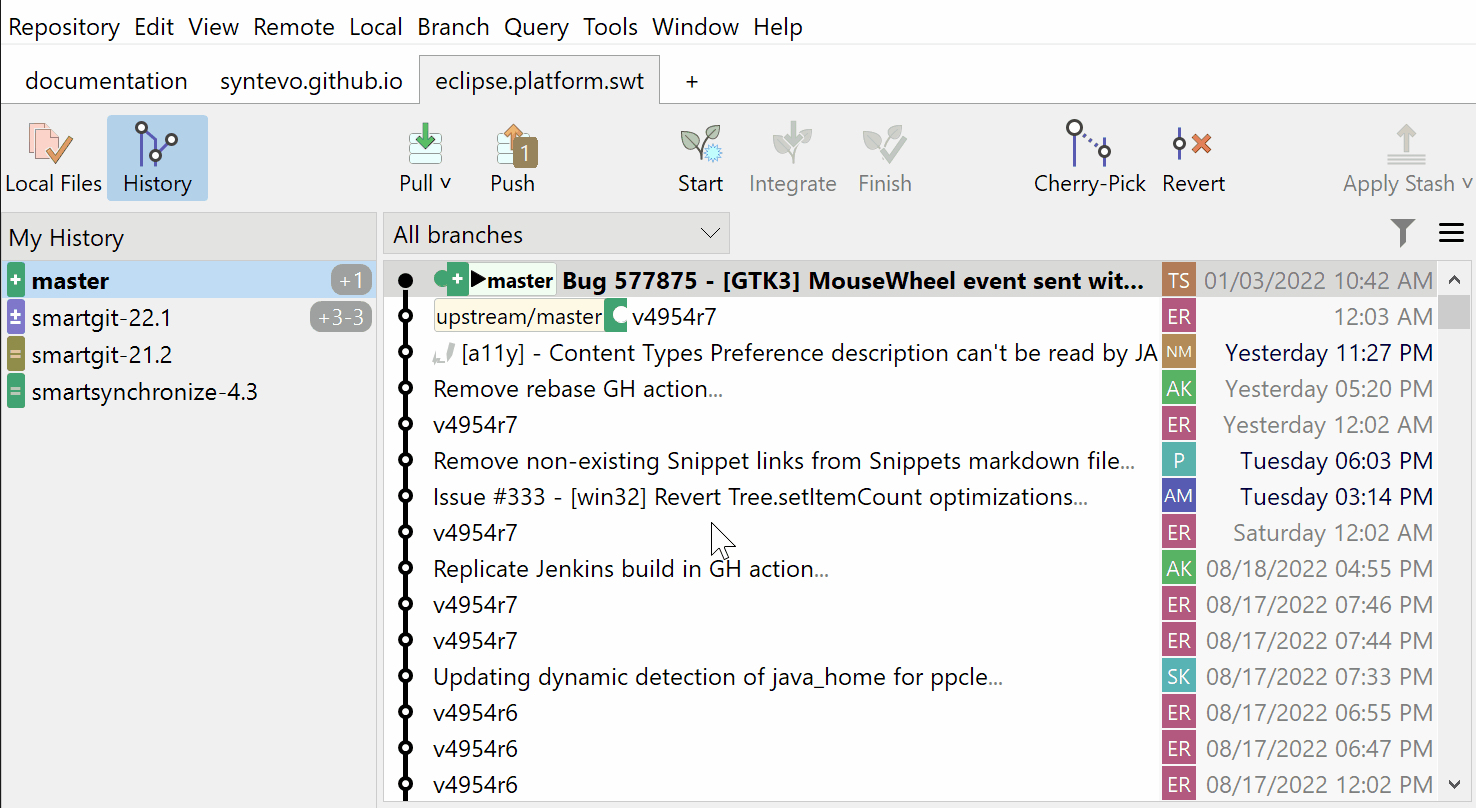
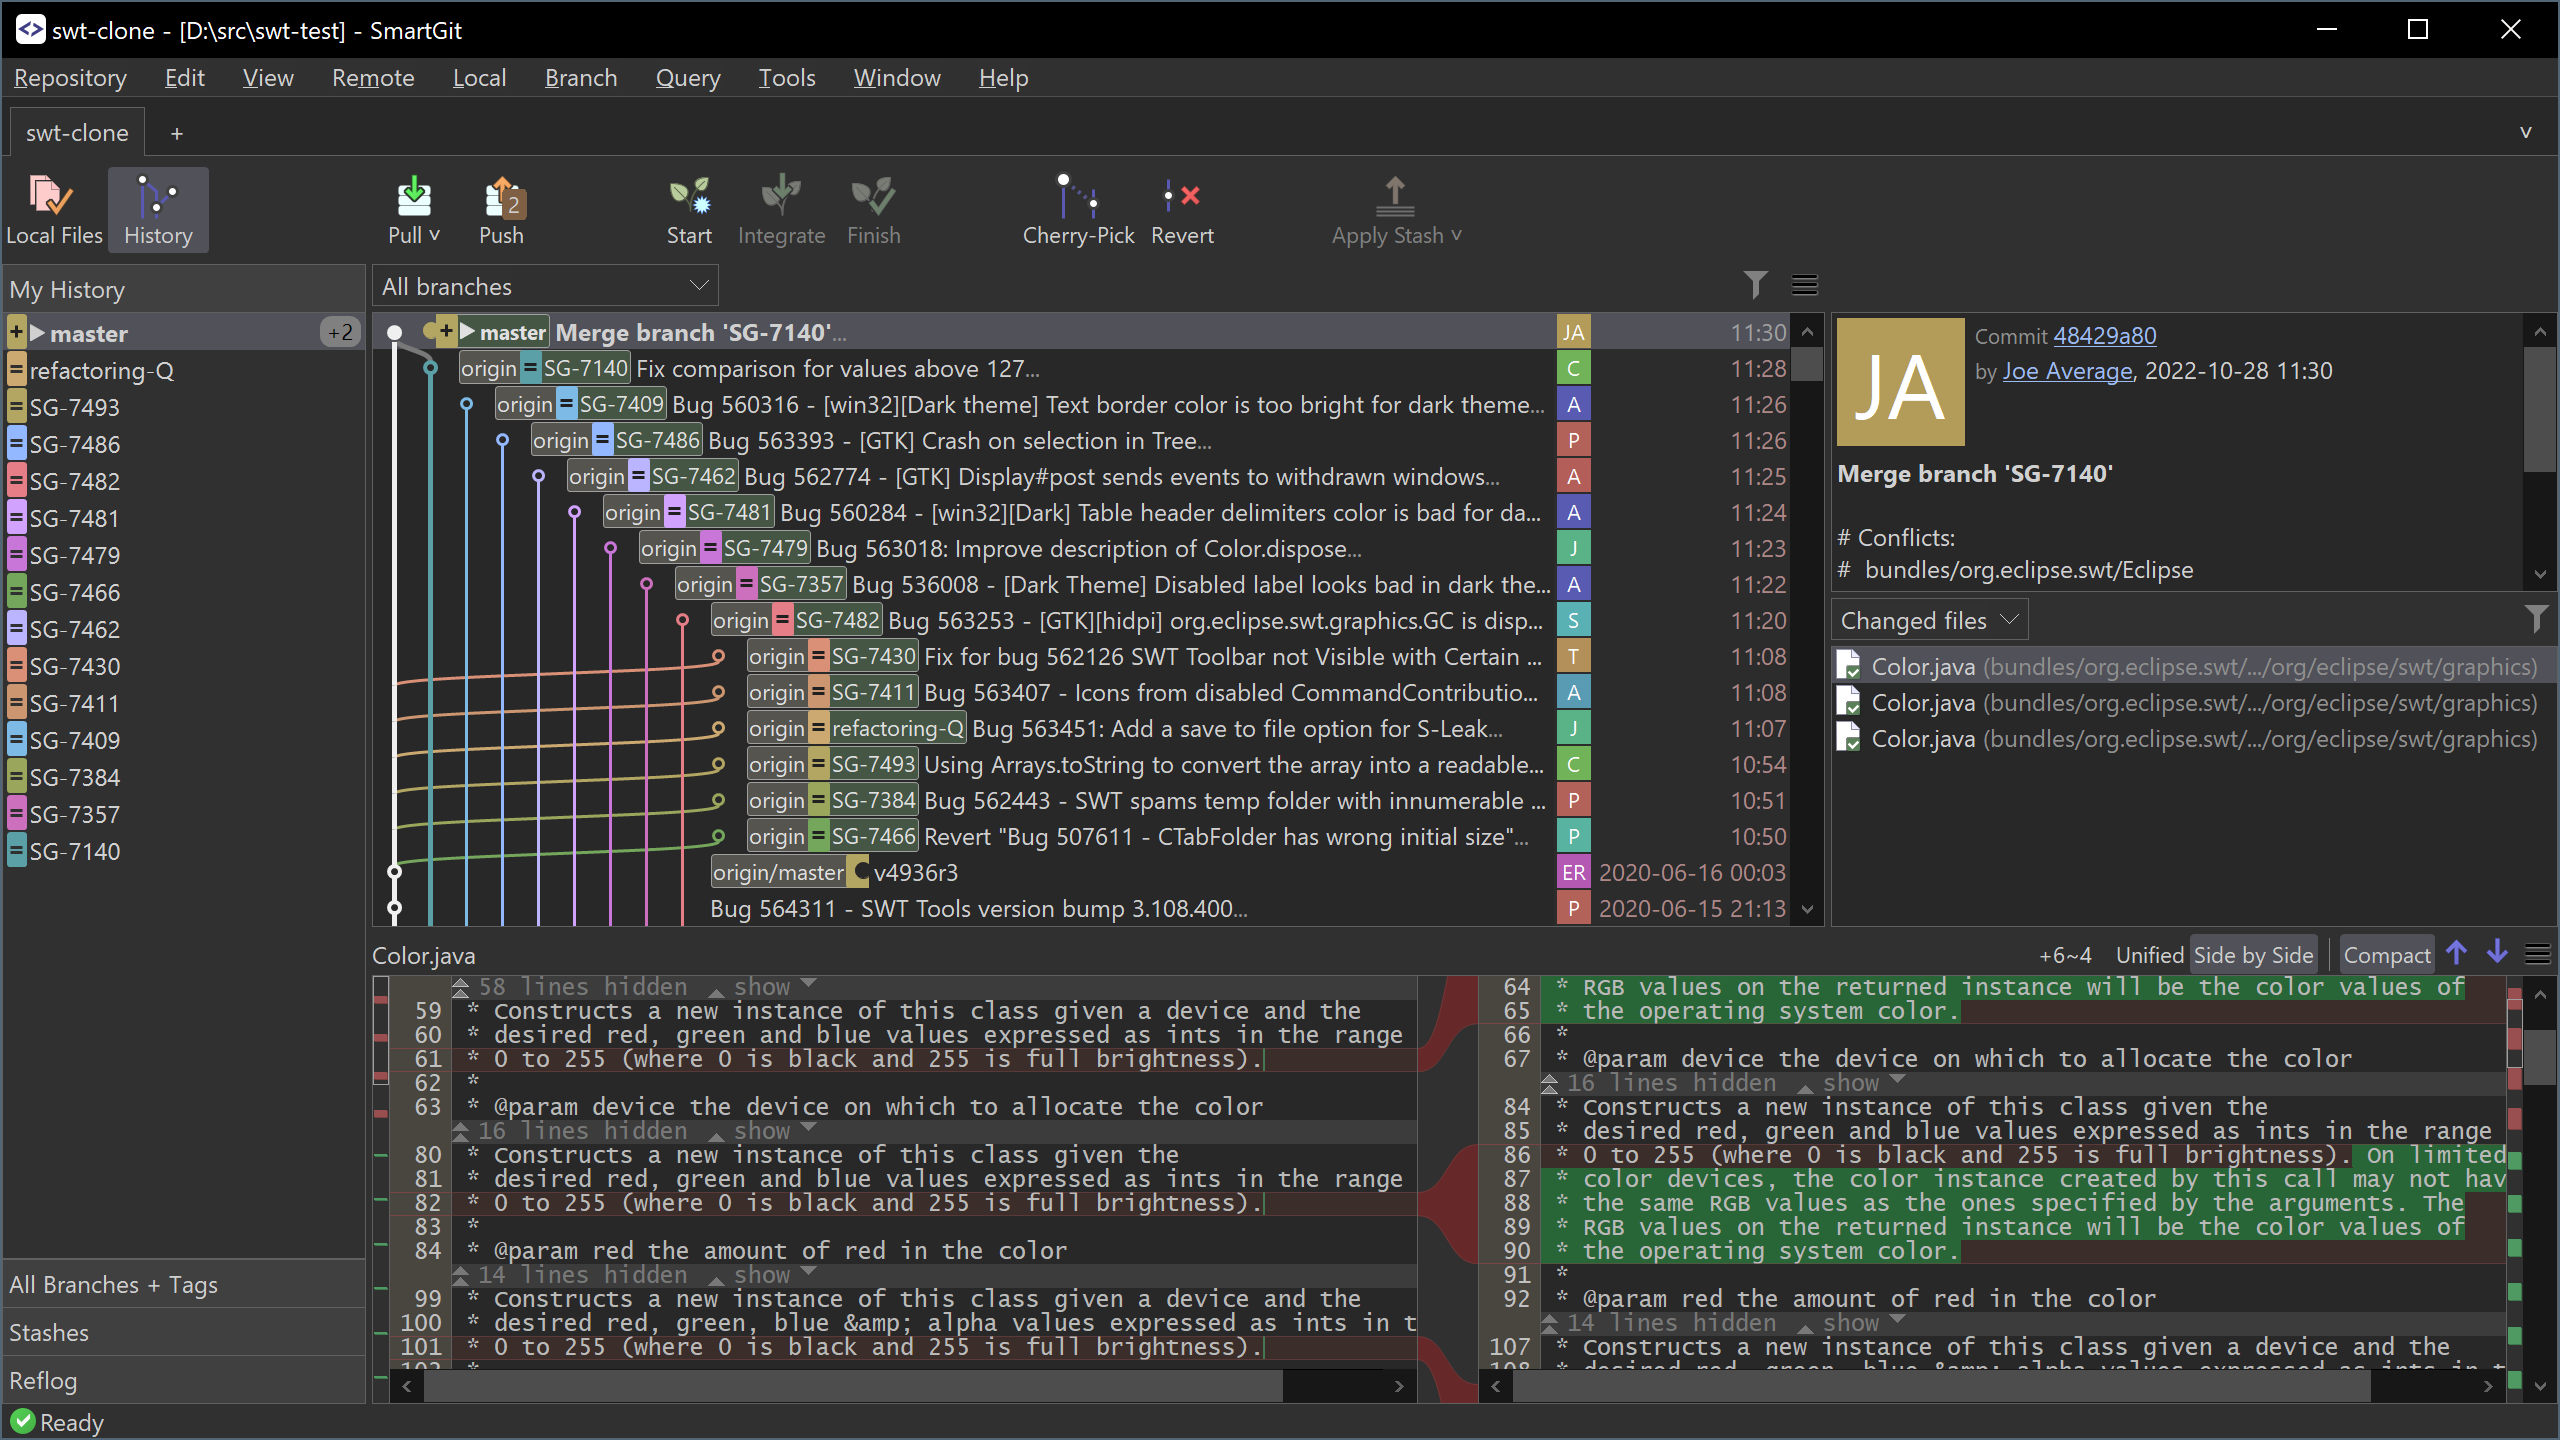
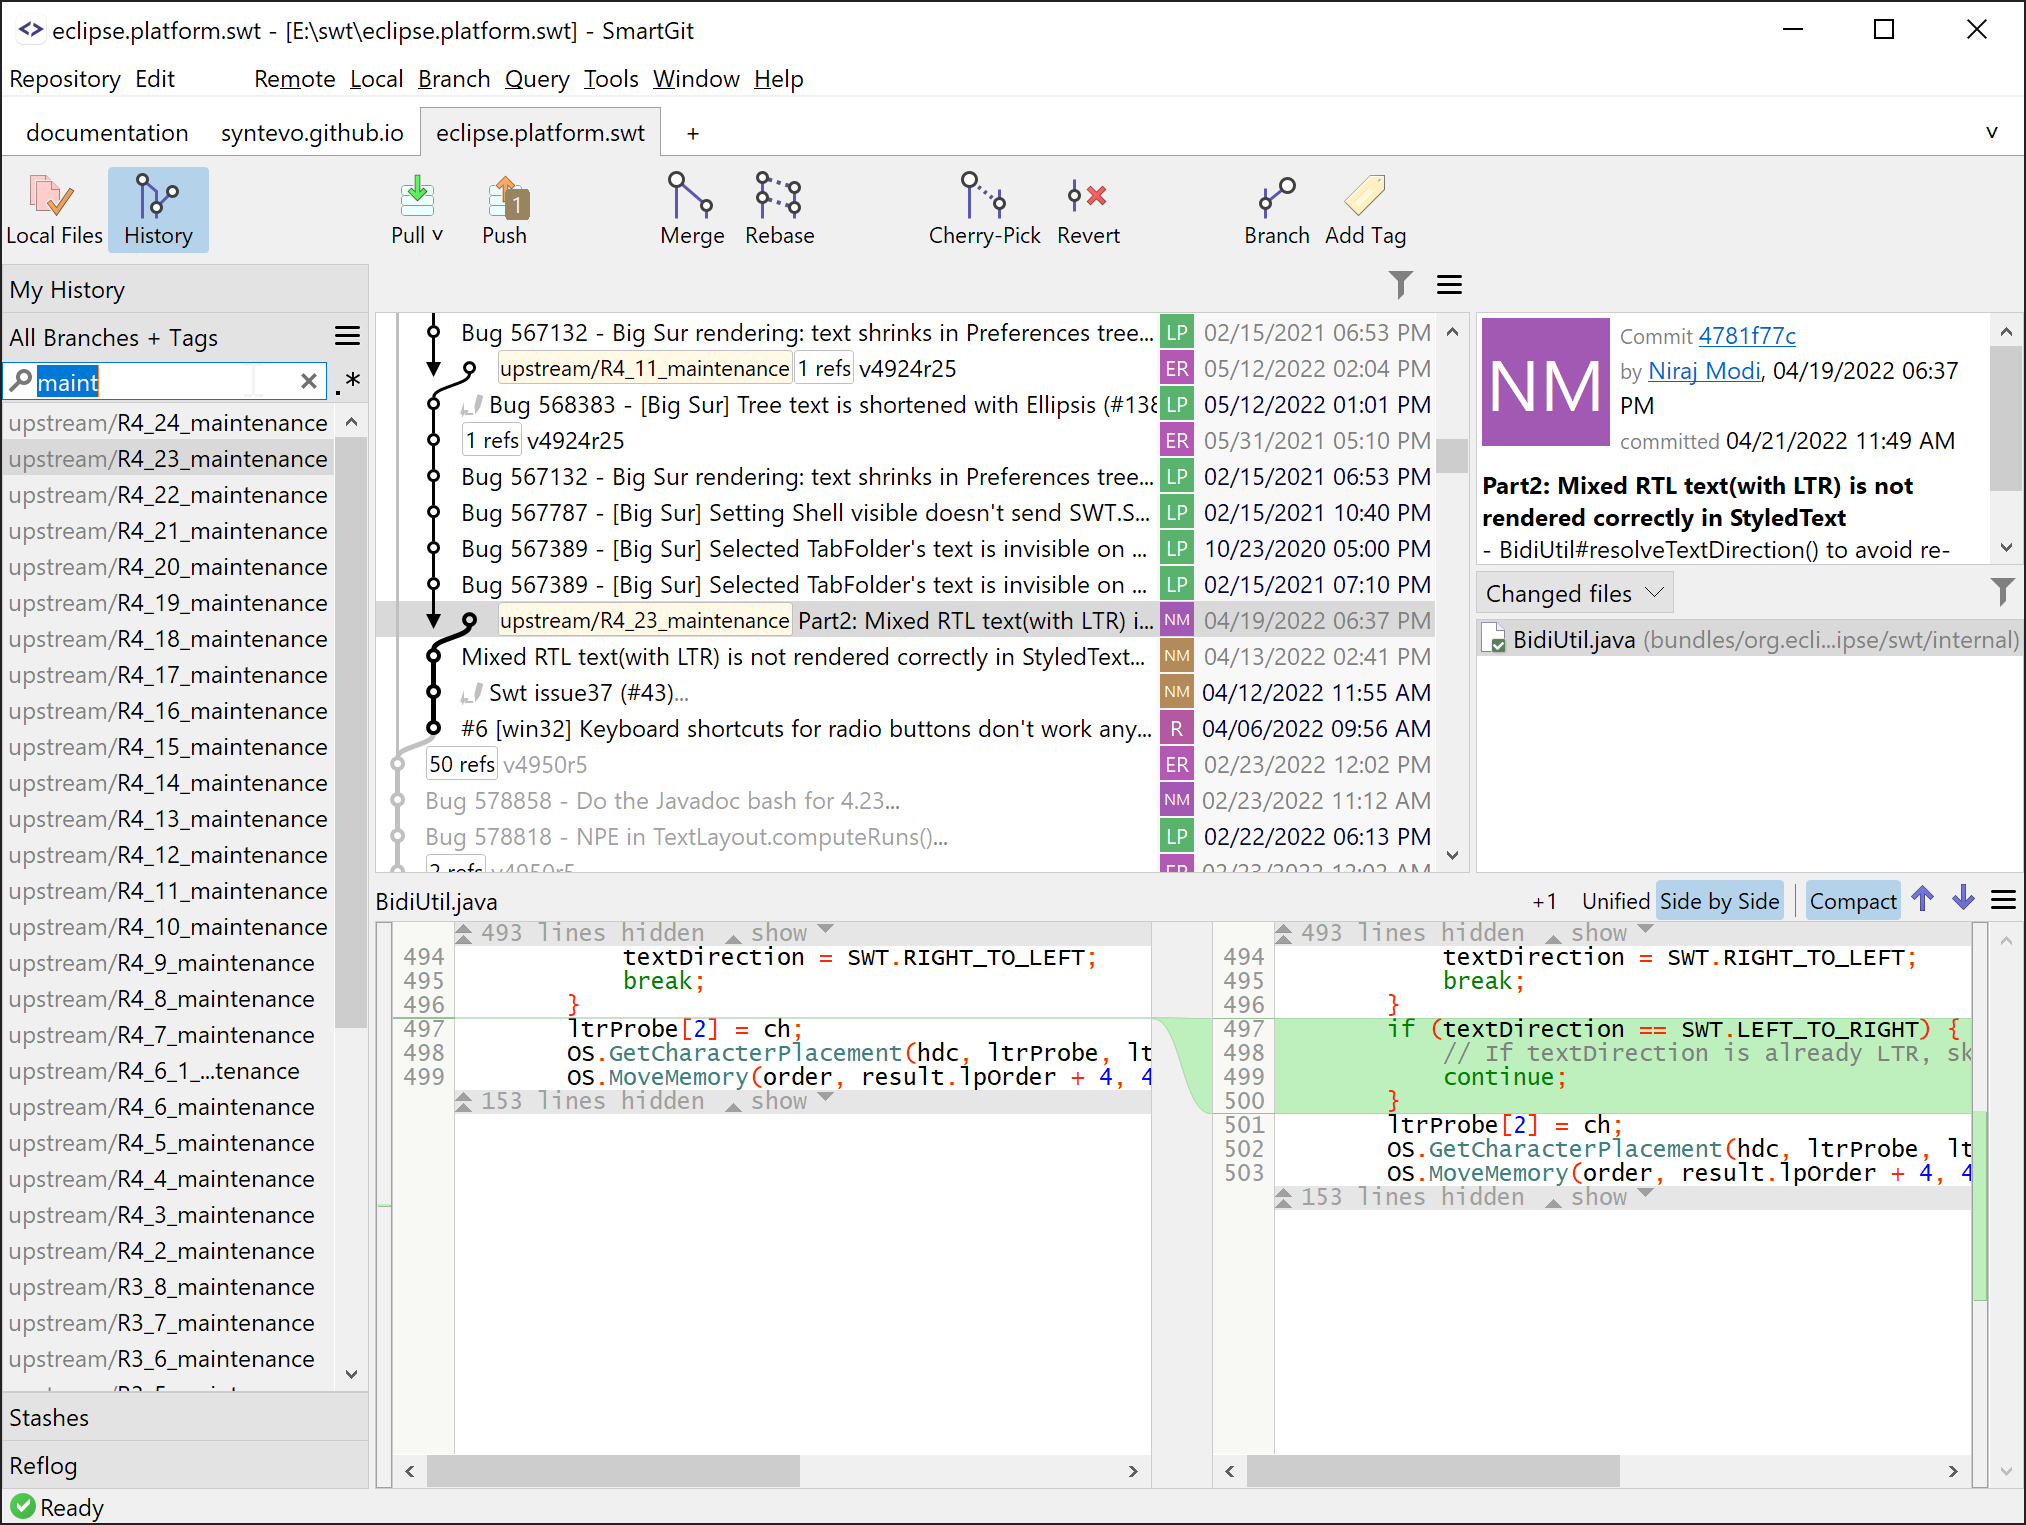
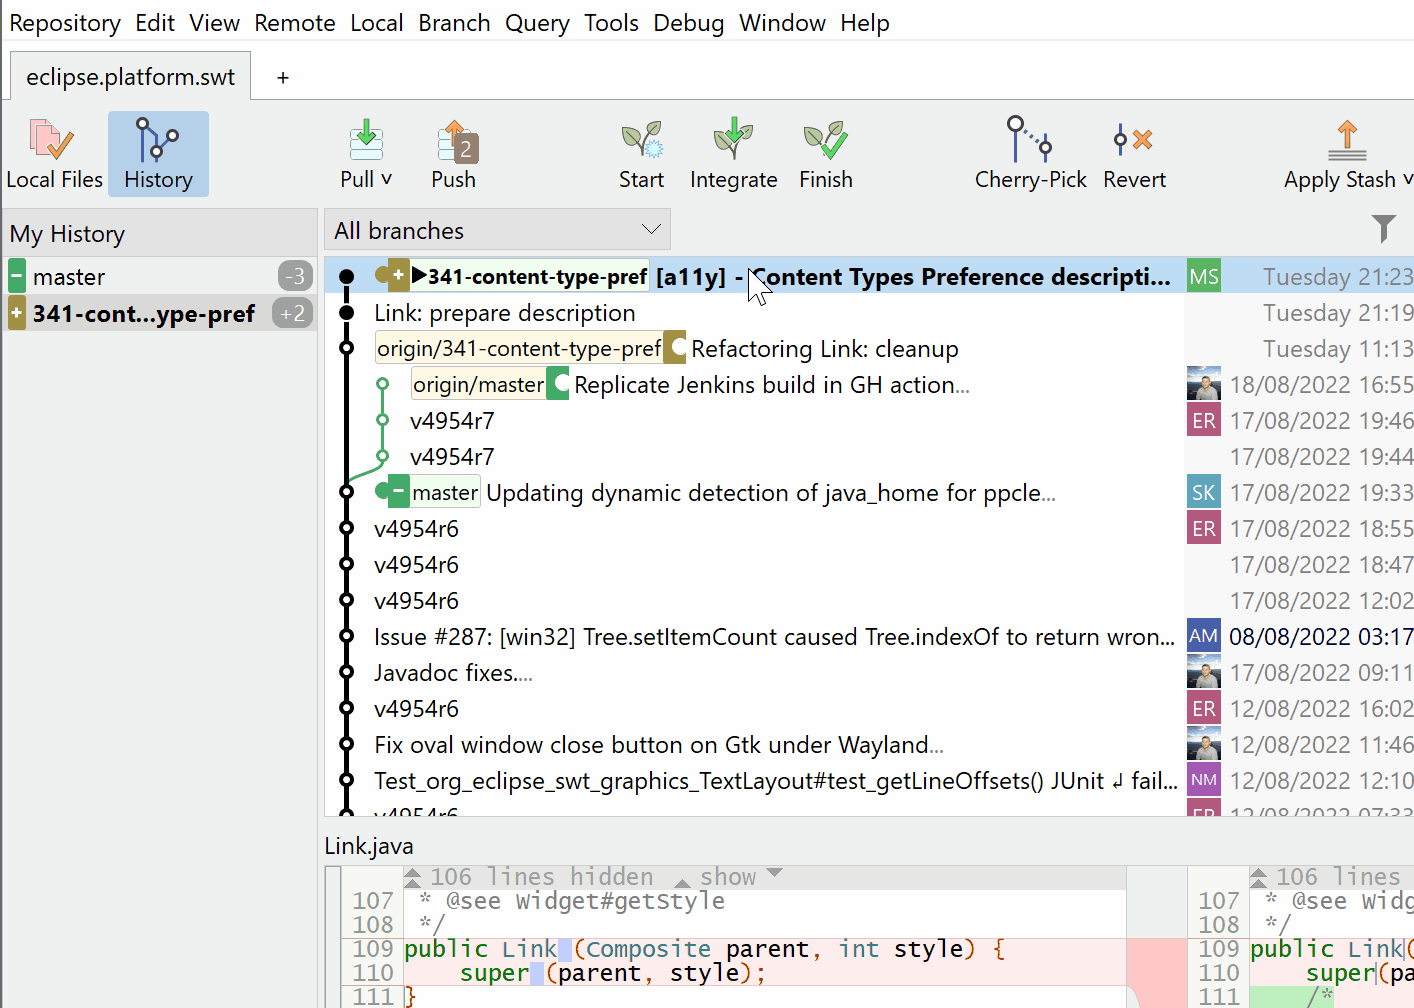
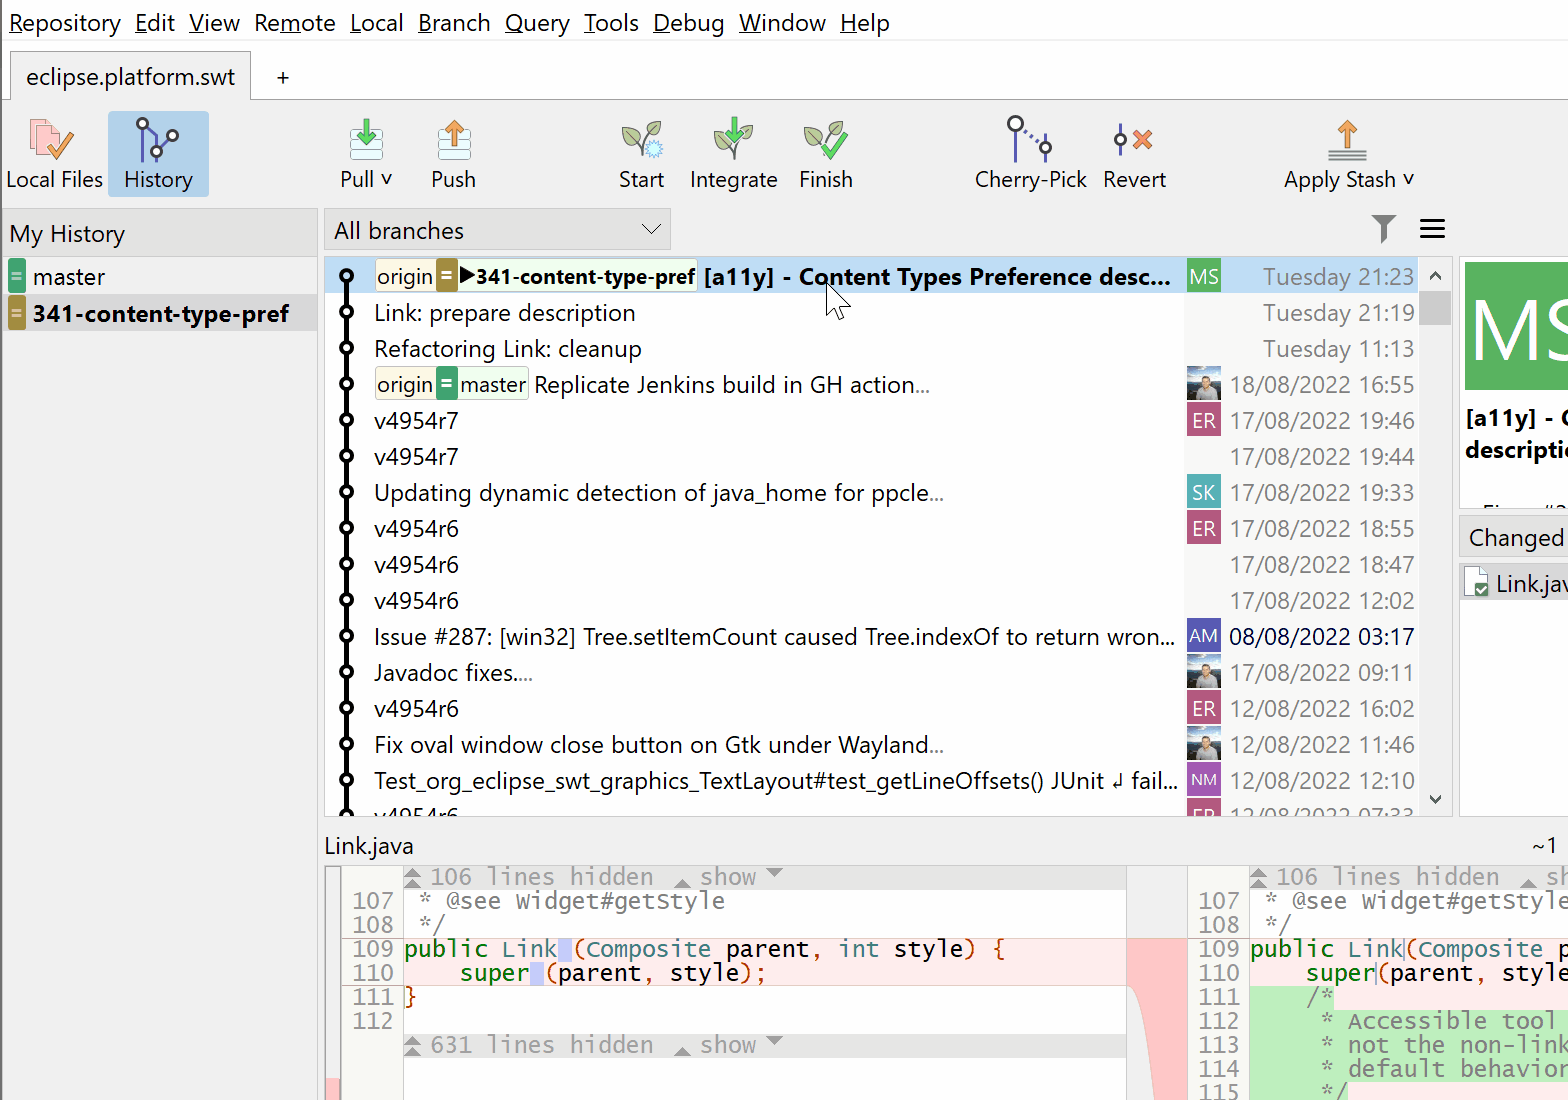
When using Git there are two types of workflows: working with local files and working with the commit Graph (history). Both types require to work with different Git data, need different commands and ideally different user interfaces. You can use the two leftmost toolbar buttons to switch between the Local Files and Graph user interface (mode). Each mode is separated into different categories by the left selector. Each category focuses on different tasks, e.g. managing my feature branches (My History), checking out other branches or looking for tags (All Branches+Tags), managing stashes (Stashes) or finding old commits (Reflog). The Graph display changes for each category and the toolbar shows the most relevant commands for this category.
The left part of the toolbar is constant for all categories. Some toolbar buttons like "Local Files" and "Push" show a number badge to indicate local changes or pushable commits.
In the Working Tree and Log windows the selected view affects on what Git data a command works (for example, Rename may work on a branch or on a file); this has turned out to be a constant source of confusion. Thus, we have simplified this in the Standard window - toolbar buttons and menu items work on the most important item. To operate on secondary items, like refs, you can use the context menu.
The Files lists avoid table headers to save screen space and avoid width configuration. To select what files to see and how they are sorted, use the comboboxes above the Files view.
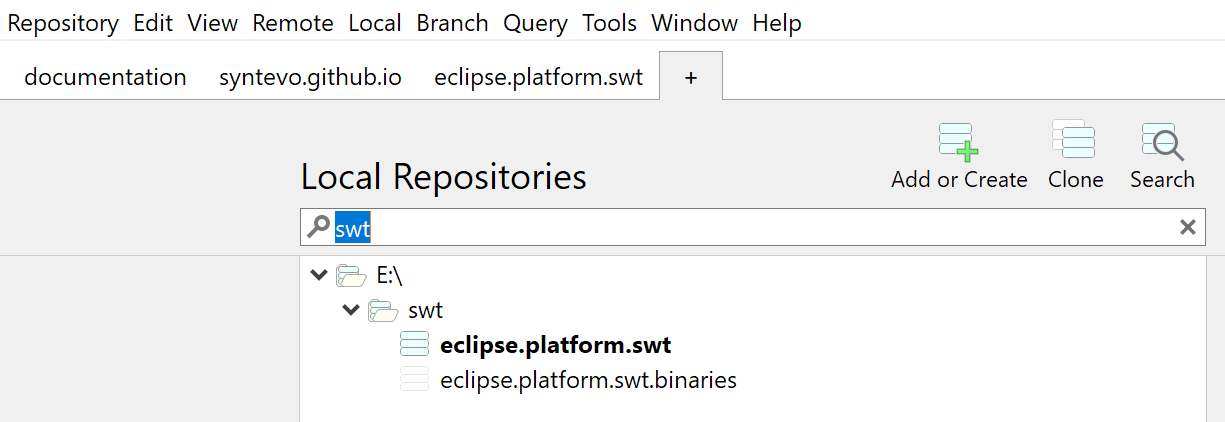
Tabs for quickly switching open repositories
Tabs are a well-known concept from browsers and other Git clients, but also save screen space. Each open repository can execute commands independent of other repositories. Use the [+]-tab to open and organize (known) repositories. The search input field helps in quickly finding a repository by name or path (parts).
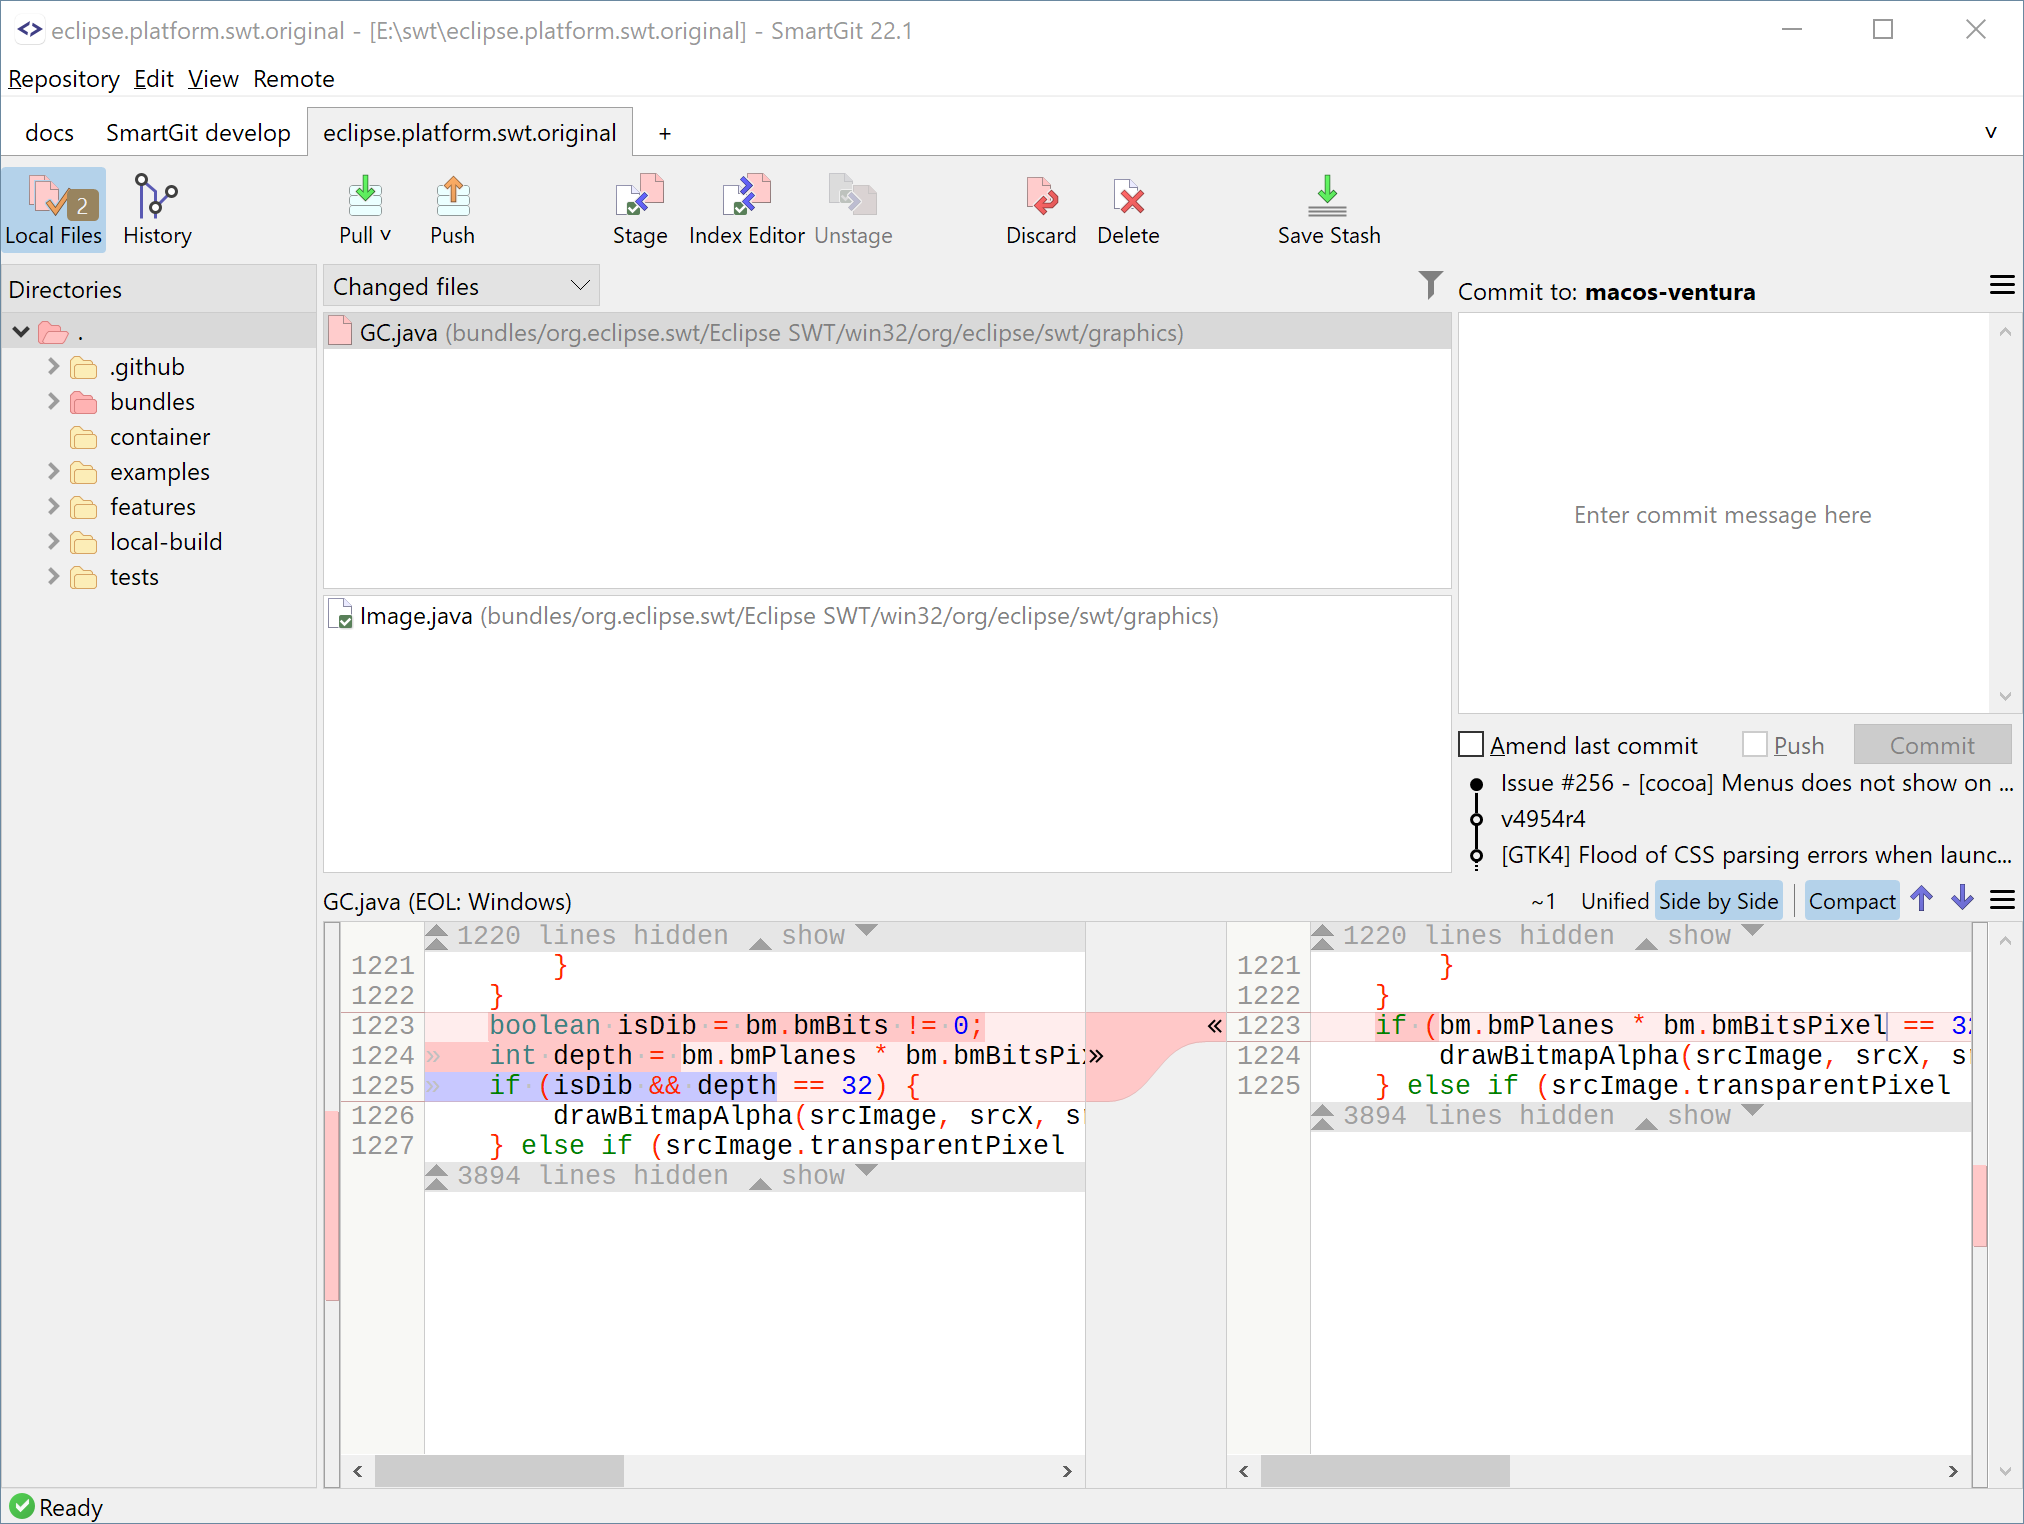
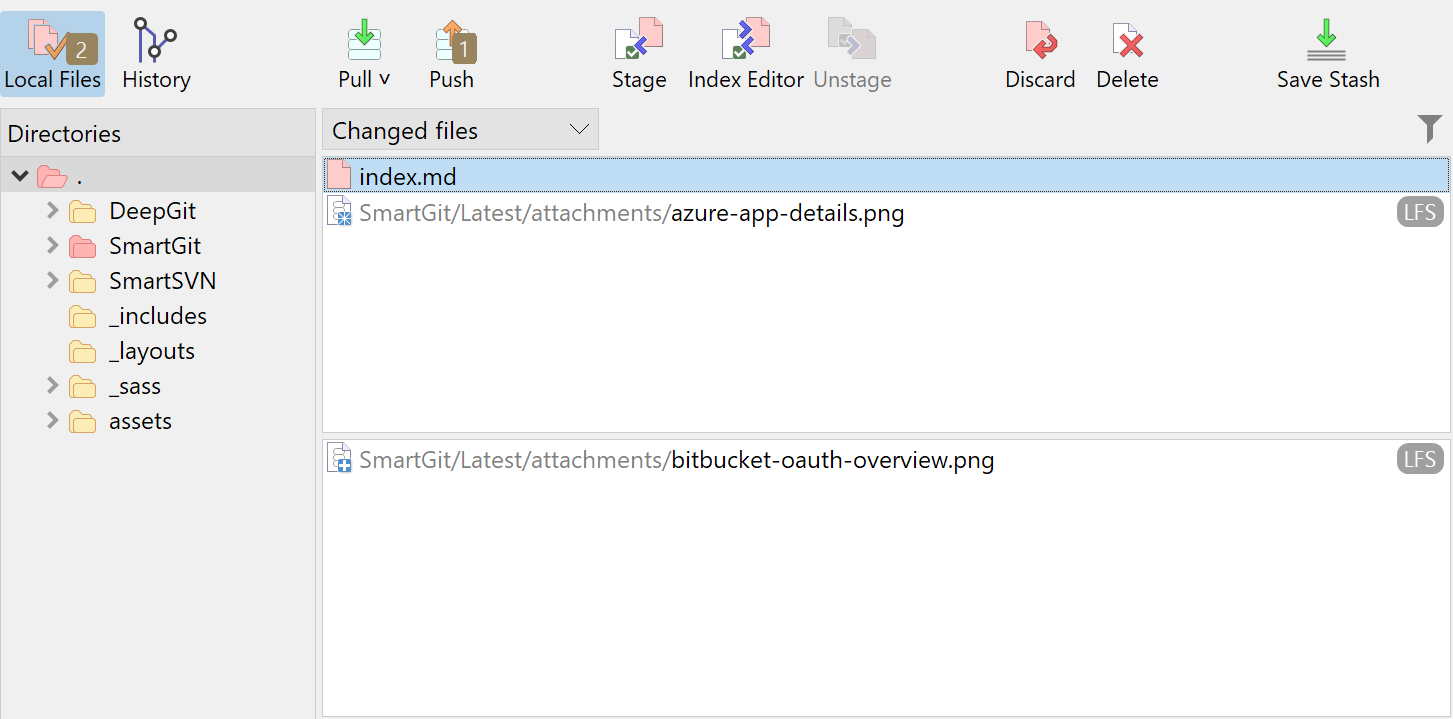
Local Files (Working Tree)
Working Tree and Index
By default, only one list for Working Tree files is shown. The Index list only becomes available after staging some files.
Note, that the list of Working Tree files is influenced by the Directories selection and file filter (click the toolbar button to reveal the filter input field), but the Index list always shows all staged files.
To access Submodules of the repository, use the Submodules category in the (lower) left selector to open the submodule as separate tab near the parent repository.
At the right side of the Files view information related to the file's LFS state is shown.
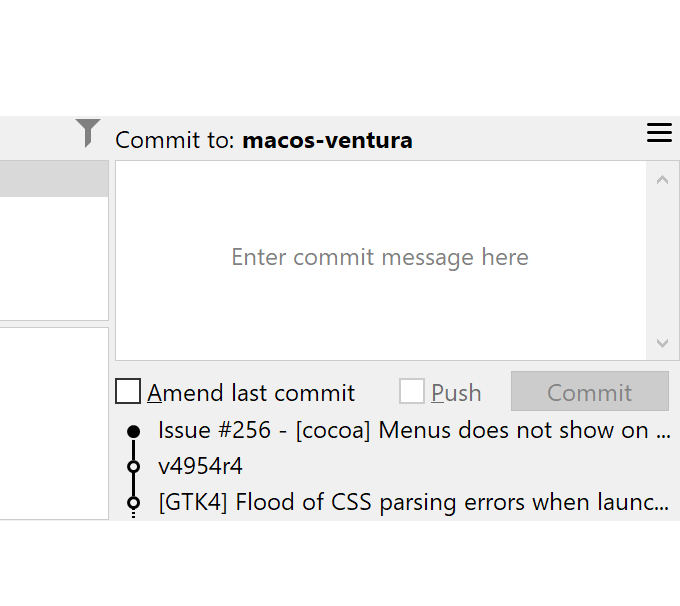
Recent Commits
Below the Commit Message text field the recent commits of the current branch is shown (up to the first pushed commit). This serves as orientation and allows to reuse commit messages by clicking them. Note, that clicking the HEAD commit also selects the Amend checkbox.
If files are staged, Commit will commit these files. If no file is staged:
- ... and multiple files are selected, these will be committed
- ... and just a single working tree file is selected, the user's intention is not clear and thus SmartGit asks what to commit.
When trying to commit unstaged files, SmartGit resets any Directories selection and file filter, so you see all the files that will be committed.
History (Graph)
Modes
Instead of one tree control with an overwhelming amount of data (and possible performance problems for repositories with a large amount of refs) separate lists are used, only one visible at a time. The selected category on the left determines the context for the Graph (visible branches, coloring) and toolbar. This allows to adjust and streamline the GUI for different workflows.
The Graph context menu strictly distinguishes between right-clicking a ref or a commit. The context menu for refs from "My History" and "All Branches + Tags" are the same as for the Graph.
The selection in the left list is synchronized to the Graph: the commit containing the ref will become selected and visible. For local branches a second click reveals the remote branch (if present).
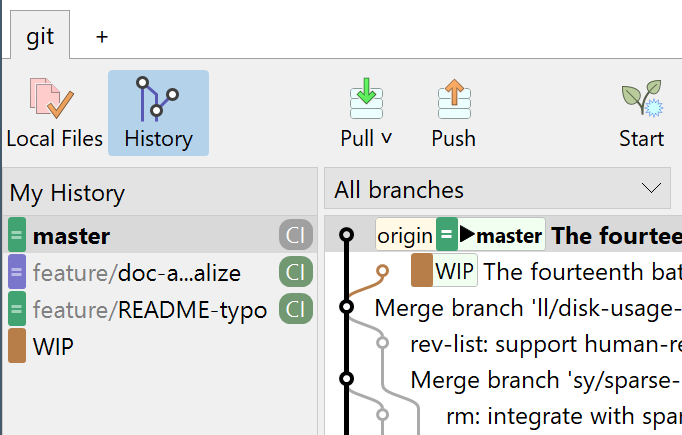
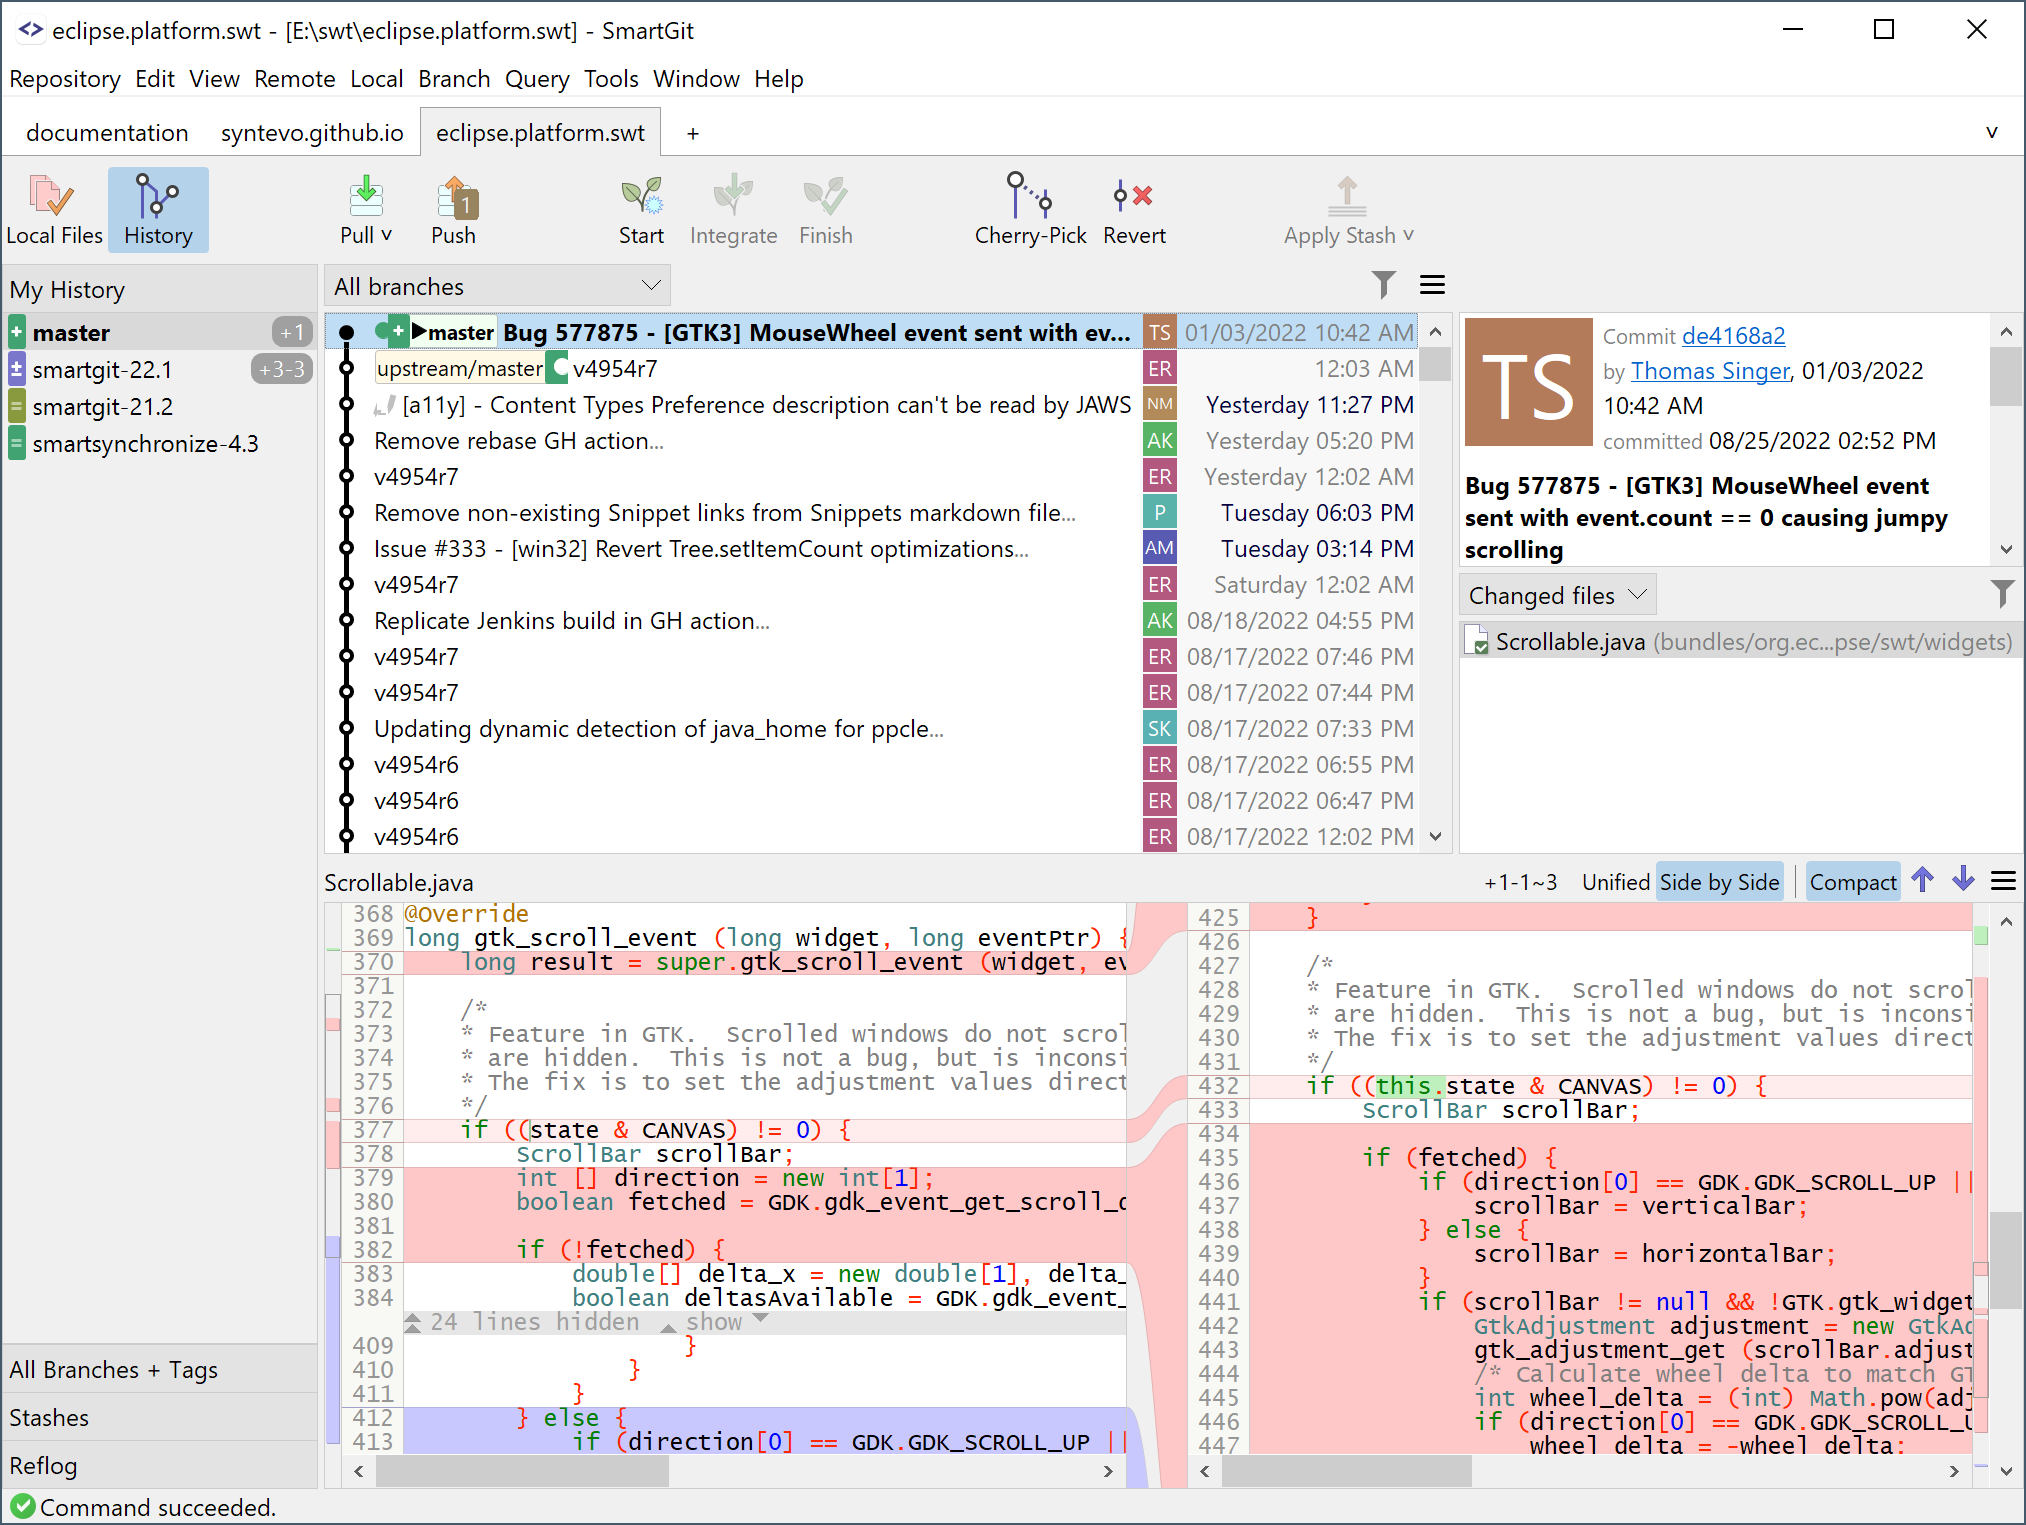
My History
This category is designed for the most common use cases when working with your features and local branches. Each local branch is identified by a constant color (derived from its name, so it will be equal for different users and different machines). For each local branch following information is shown:
- outgoing and incoming changes
- continuous integration state (see below)
The Graph can be switched to show all listed branches or just the current branch (HEAD), using the combobox above the Graph. There is no individual selection of the displayed branches as in the Log window.
Smart Pull
The pull command comes without confirmation or options dialog. Like many other commands, it requires a clean working tree and index. This helps to avoid additional conflicts caused by local modifications.
Pulling will automatically forward all local branches, if they were matching their tracked branch before. It will also delete obsolete tracking branches if they have been merged.
Fetching is possible using the Pull toolbar's popup menu that shows up when click-holding the toolbar button.

All Branches + Tags
This category is meant to check out from remote branches, to access all (remote) branches and tags. Coloring is merge or rebase oriented.
A filter input field helps in quickly finding a branch or tag. The Graph only shows those branches and tags which are listed after filtering.
By default, tags are not listed if no filter is set. Their listing can be enabled in the hamburger menu.
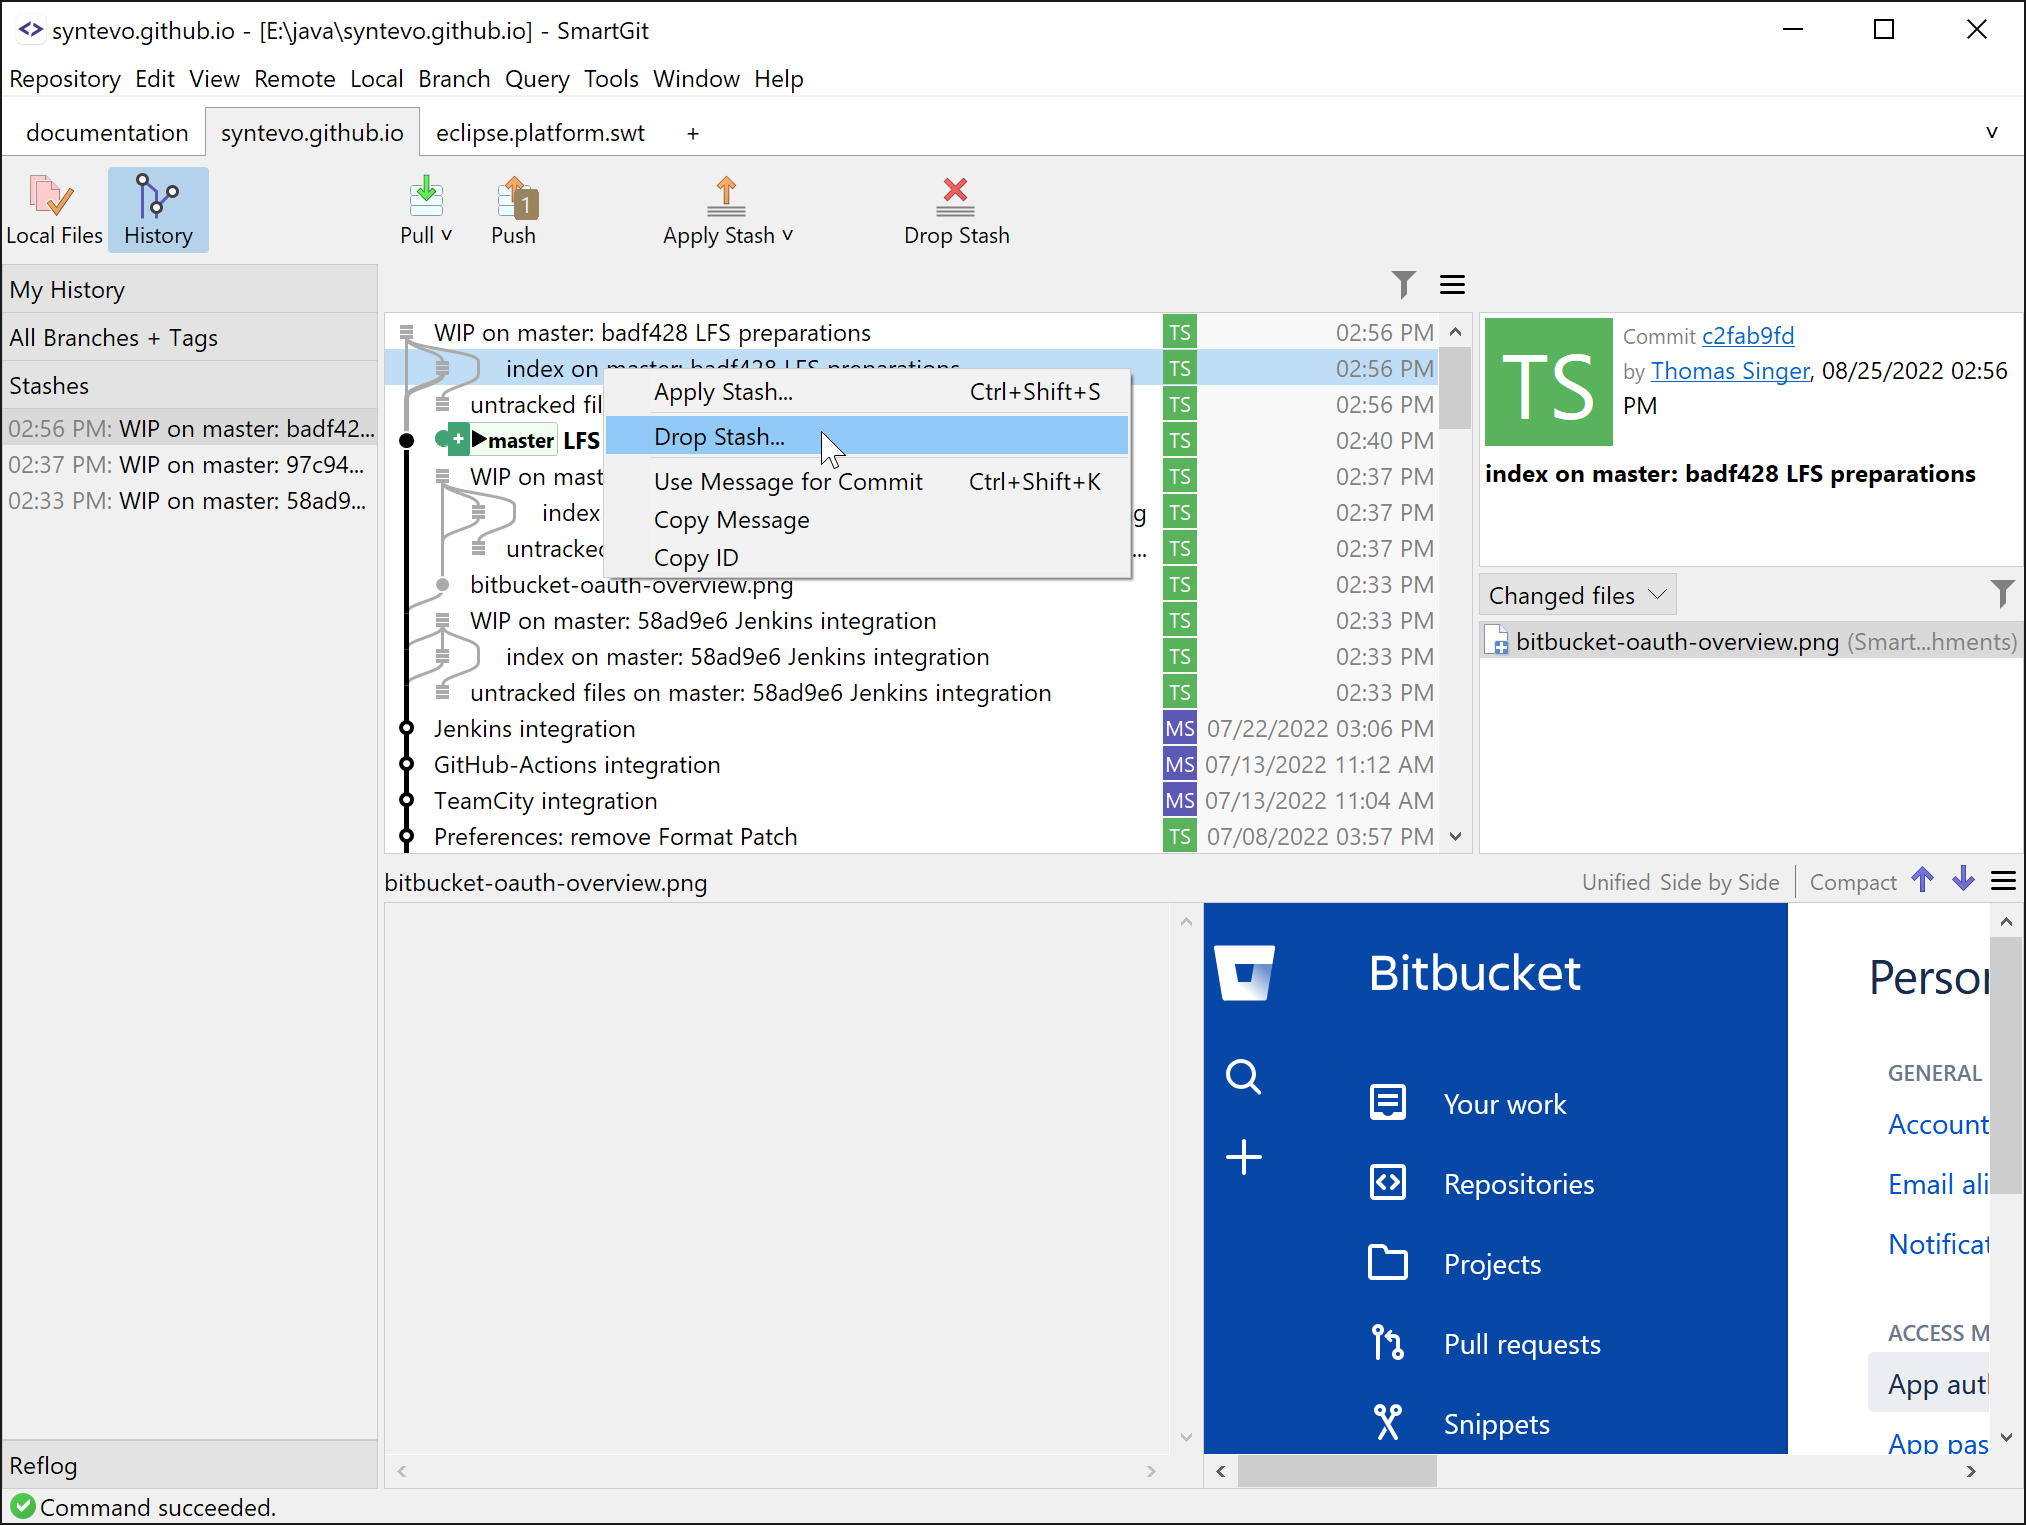
Stashes
This category is designed to look inside stashes, and to find, apply or drop individual stashes. Creating stashes is possible in the Local Changes mode and applying the last stash(es) is also possible in My History and All Branches + Tags categories.
Reflog
The Reflog shows all commits from .git/logs/HEAD. Instead of showing all recyclable commits at once in the Graph, only the current branch's history and the selected reflog commit will be displayed. Gray commits are part of the HEAD's regular history, black commits are separate forks (similar like Recyclable Commits in the Log window).
Feature Branches
The support for feature branches is inspired by Git-Flow and will also honor the repository's Git-Flow configuration. Significant advances over the standard Git-Flow implementations are improved safety checks and Push-atomicity.
Integrate Main Branch
This command will integrate new changes from the main branch into your feature branch. It consists of multiple phases and will stop for the first phase for which local commits have been integrated (i.e. rebased):
- a Fetch is performed to retrieve possibly new commits for the feature branch and the main branch
- new commits from the remote feature branch will be integrated
- new commits from the main branch will be integrated
- optionally, the feature branch will be pushed, to prepare for Finishing the branch
Finish Feature
This command offers an atomic way of finishing the feature branch. It either succeeds or fails in the current state.
It always first fetches possible remote changes. If either the feature branch or the main branch are diverged, finishing is not safe and thus it falls back to Integrate (see above).
Finish Feature offers to merge or rebase, remembering the last option. For just one feature commit it will always rebase.
By default (and strongly recommended), the result will be pushed immediately to lower the likelikhood of potential conflicts due to new remote changes. If the push fails because of remote changes, it will fetch the latest changes and keeps you in the feature branch state. In this case you will have to first integrate the remote changes and test again.
For GitHub repositories it also is possible to create a pull request instead of merging/rebasing.
Integrations
GitHub Pull Requests
My History shows GitHub pull requests where you are "involved". These are:
- incoming pull requests which are either assigned to you or for which you have been set as reviewer,
- outgoing pull requests which have been created by you
These pull requests are immediately fetched (on Refresh), so local commit information is available. This is contrary to the Log window for which pull requests have to be explicitly fetched and local commits have to be cleaned up.
The review-state of pull requests will be indicated and important states like "needs review" or "rejected" will be highlighted.
You can create GitHub Pull requests either manually or as part of Finish Feature. You can approve pull requests from the context menu or switch over to GitHub by opening in the web browser.

Continuous Integration
For GitHub Actions, run results will be display. See the documentation for details.
Jenkins build results will be displayed, once configured. See the documentation for details.
TeamCity build results will be displayed, once configured. See the documentation for details.